Showing posts with label Make-Up. Show all posts

Sunday, April 13, 2014

My Take On: Organizing Makeup

To be completely frank, I've never been a huge makeup junkie in my 21 years of existence. It has nothing to do with my environment... cause I grew up in a school where girls had eyeliner on since middle school. I've always been quite conservative and never really thought much about makeup. It was after college that I began to expose myself to the makeup world, and I guess now I can say that I've officially joined the "makeup band wagon" LOL! =)

I'm not overly obsessed with makeup, so I don't always find myself seeking for the latest designer or drug store products to try. I only have one face after all, so it's understandable that I only have a conservative amount of makeup right? hehe

Anyway, getting to the point, I recently found myself a little frustrated with how messy my makeup is. I share a bathroom and it just isn't right for me to hog all of it and clutter other people's space with makeup just because of my lack of organization. I came to the conclusion that I needed some type of organizer and wallah!!... I found the perfect one from T.J. Maxx! Score!


I know I know.. it looks kinda small, but that's all the space I really need to hold my makeup "essentials". On another note though... isn't it cute? (haha not sure if that's the right word to describe it!)

I love the way the organizer looks, and I love how it is designed! I'm sure you guys can tell, but I'll say it anyways... this is a 3 layer organizer that has opened slots aligned in the back for I guess brushes and any products that in this case.. "I" want standing! =)  


Because we don't know what these things have gone through, and should never assume that they are clean, I decided to wipe down the makeup organizer! 

Alright, now we're done with the boring part... this is what I had to work with! 


Out of my makeup and makeup applicators, I had to sort out the ones that I wear more often apart from the ones that I wear like... never. And after about 15-20 minutes this is the transformation that I am super duper proud of!....


This is how I organized my makeup and I'm seriously so proud of it! It's been a few weeks since I've organized my makeup and surprisingly I've kept the organizer looking exactly the same! 


In the back top left slots, I decided to put products that I prefer standing and can easily be obtained: Eyeliners, Mascara, Wet Q-tips, Eyeshadow Primer & BB Cream! 


As for the back top right portion, I aligned the slots with my most often used brushes: Powder Brush, Blush Brush, Foundation/BB Cream Brush, Blending Eyeshadow Brushes & the more Precise Eyeshadow Brushes! 


As for the three layers, I organized my makeup from most to least used. The top layer includes my Powders, Blushes, Highlighter, Mascara, Eyelash Curler & Lip Balm.  


The middle layer includes my Bronzer, Eyeshadows (I rarely ever wear eyeshadow), BB Cream (One that I least prefer) & Lipsticks (I usually carry lipsticks in my bag, so what you see are ones that I favor least atm.)


And lastly, the bottom layer holds my least used products: Fake Eyelashes, Extra Powder Pad, Eyeliner Sharpener, Eyeshadows, Mascaras, Make-up Setting Spray & Lip Gloss! 

So yah! I guess that pretty much concludes to all the essentials I have in my makeup organizer! I had such a fun time working on this project! Not only did it help me with the obvious...keeping organized, it also opened my eyes to how much makeup I didn't used. I ended up storing the rest of my makeup away, and threw ones that I've had for way.... too long in the trash! 

I haven't read through this blog post yet, but I have a feeling that it's a pretty long one! I hope this post was enjoyable and somewhat helpful? If you guys have any tips on how to organize makeup, feel free to leave a comment below! 

Alright, I'm gonna get ready for bed now. See yah later alligator!~ =)

xxxx,
Wing

find me on: Facebook | LookBook | Youtube | Pintrest 


Wednesday, February 13, 2013

New Youtube Video: Review on the Boots Expert Sensitive Gentle Eye Make-Up Removal Lotion!

I feel like whenever I'm blogging, haha I'm always either munching on something, or am drinking something!  Well, like always, I'm doing exactly that!  Except, it's kinda of a more weird combination this time compared to last time!  haha Instead of just concentrating on one drink, I'm taking turns drinking two!  Anyway, I'm drinking a yummy box of Coconut Flavored Vitasoy Milk (my current favorite beverage!) & taking turns sipping on my hot water, cause I have braces and I want to make sure that my mouth is rinsed whenever I'm drinking or eating something sweet!  haha cause I don't want the sugar to eat up my bracket glue!!

Anyway, the whole point of this blog is to talk about my new youtube video!!!! Yay!  Last weekend, I filmed a Review on the Boots Expert Sensitive Gentle Eye Make-Up Removal Lotion!  So far I've been writing my reviews on my blog, and I just thought that it'd be a fun idea for me to film a video review, so for those who would rather watch a video than to read a blog post, this is perfect!  =)  And that's exactly what I did!  Let me show you guys that video, and then I'll give a brief summary of it!  

Click the Video Below to Watch: 

Below is a picture of how my entire thumbnail looks like!  
Besides talking about the product, and giving my own opinion on it, I also included a demonstration, showing everyone how the product works, so I hope that's helpful!  I also gave a detailed description of what Lanolin is, which is an ingredient that the Boots make-up remover didn't contain, so check my video out if you want to learn about what Lanolin is!  I think it's so so important to understand a product prior to purchasing it, and I guess despite me being a total hypocrite while advising that LOL, I got really lucky! =)   
Alright, so first of all, before I begin my summary, I just want to take the time to talk about my hair!  =) haha I trimmed my overly long literally non-existent side bangs  into front bangs...the day before I filmed the video, and yah so far I'm really loving it!  =)  Anyway, I'll include pictures of my bangs later on in the post!  
SUMMARY BEGINS! 
Alright, so it was probably around half a year ago, that I started wearing make-up more often!  As of now, I still don't wear my make-up on a daily basis, but I do it way more often than when I was in college.  Since I started wearing more make-up, I started using make-up removers to remove my make-up, because a normal cleanser is simply not enough to clean of my make-up! So far, I've finished up 2 bottles of eye make-up removers already, one of them being Estee Lauder's Eye Make-Up Remover.  I don't quite remember how that one worked, but it was on the more high-end and pricey side, so I decided to experiment with drug store eye make-up removers.  
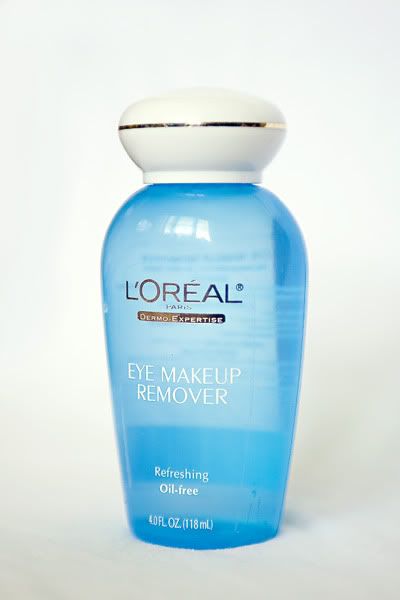
My experimenting brought me to my second eye make-up remover, which was from L'oreal.  Despite me finishing the entire bottle, I disliked the product because often times, the product would seep into my eye while I'm cleaning my eye make-up, and would cause me to go through a lot of pain!  I'd end up having to drop my cotton pad filled with the make-up remover, and start rinsing my eye out with water even before I'm done cleaning my eye make-up off.  I really disliked using the L'oreal eye make-up remover...but I really don't like to waste things, so I endured the pain and finished the entire bottle up!  Here's a picture of the one I'm talking about!  
IMAGE ABOVE IS FROM GOOGLE.COM
Yep, that's the one I'm talking about, so nope I wouldn't recommend it!  
Anyway, soon after I finished the L'oreal eye make-up remover, I moved onto using the Boots Expert Sensitive Gentle Eye Make-Up Removal Lotion (because the name is so long, I'm going to call it the Boots Eye Make-Up Remover =)).  
IMAGE FOUND ON GOOGLE.COM
During the time that I purchased the Boots Eye Make-Up Remover, I actually had no knowledge of the brand!  A worker at target actually introduced it to me, and learning that it's dermatologically tested and oil based (which meant removing make-up from eye will become a smoother process), and seeing that it only contained 7 ingredients.... I decided to try it out!  I forgot how much it cost, but it costs $5.49 on us.boots.com!  It's a pretty good price for such a big bottle!  So far I've used it for a few months, and I'm not even half way done, so yep it's definitely a really good price for how long it can last!  
In my video review, I basically gave a super detailed description and introduction regarding the Boots Expert Sensitive Gentle Eye Make-Up Removal lotion, and I strong recommend you to watch it if you want to learn more about this product, or if you are looking for a good and recommendable and affordable eye make-up remover!  
Hope this post was helpful, and yep haha remember to check out the video! LOL =P
To end this post, here are some picture of my bangs!  So far I'm really loving them! =)  ( I think I said that already....
I'm actually considering keeping them!  This is my third time having front bangs, and having this be the 3rd time experimenting with cutting bangs, I think my hair cutting skills are seriously improving!!! LOL =)  I wonder how often I need to trim them!  I never know!  And before I know it, they get too long, and eventually become side bangs again!  Anyway, thanks for visiting my blog guys, have a great day!  


Monday, February 4, 2013

Review On: Jordana Quick Shine TopCoat

If you guys love doing your nails like me, then one thing you might put an emphasis on is the quality of the top coat!

So what exactly is a Top Coat?  

Well, at top coat is basically an overcoat that helps set your nail polish.  After applying multiple layers of the nail polish color of your choice, the next step, is to apply a top coat on.  The top coat polish will harden as it dries, and it eventually creates a shield that prevents your newly polished nails from chipping, peeling, and getting scratched.  Everyone has their preferred points to a good top coat, but in general, a really good top coat prevents chipping, peeling, and scratches for at least up to 5 days.  lol there are even super good top coats out there that can have your manicure last up to 2 weeks before any visible chipping!  

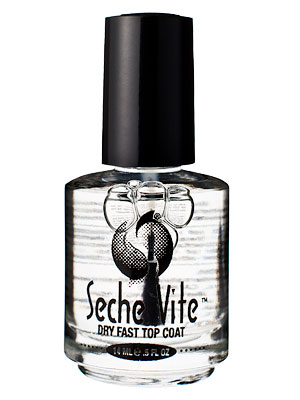
IMAGE FOUND ON GOOGLE.COM 

Seche Vite's top coat is my personal favorite!  As you can see on the bottle, the words "DRY FAST TOP COAT", is emphasized on the bottle, and that is a huge factor to why I love this nail polish!  Seche Vite's Top Coat is one of the highest ranked top coats, but there is 1 problem that it carries.... it's expensive price!  It really depends on where you buy the top coat, but the average cost of this top coat costs around $10.99, which is pretty pricey...even more expensive than O.P.I nail polishes.  Anyway, it was after I finished my second bottle that I decided to try out different top coats, preferably ones that are less expensive.  

So Lets Talk About
JORDANA QUICK SHINE TOP COAT!


So one day, I was looking around a drug store around my area, and I happened to find the JORDANA Quick Shine Topcoat.  I actually ran out of top coat around that time, and wanted to buy a top coat to use temporarily.  One of the biggest points I look for in a top coat is how quick it dries.  I'm pretty impatient when it comes to waiting for my nails to dry.  haha I tend move around a lot, and before I know it, my nails are all messed up, which means I'd have to redo my nails!  That's actually why I liked Seche Vite's Top Coat so much, it dried within seconds, which was amazing!  

Anyway, I decided to purchase a bottle of Jordana's Quick Shine Top Coat, and I ended up extremely impressed with the results!


Above are some pictures of my nails that I have previously posted on my blog!  With that being said, I actually used Jordana's Quick Shine Topcoat with all of them!  

Review on Jordana's Quick Shine Top Coat: 
I really enjoyed using Jordana's Topcoat!  It definitely dried within 60 seconds (as told on the bottle), and the outcome looked amazing!  The outcome resulted in a very nice shiny flawless overcoat!  The top coat not only dried fast, but it also helped quicken the drying pace of my base nail polish!  I love using dark colors on my nails, but despite that, the opaque and dark colors take FOREVER to dry!  I realized that the Jordana Quick Shine Topcoat actually reacted with my base nail polish color, and aided it in drying!  

Seriously...instead of waiting for more than 5 minutes for my nail polish to dry before applying a top coat on, what I literally do, is paint all 5 of my finger nails with the color I like, and almost right immediately, I'd brush on a coat of Jordana's Quick Shine Topcoat!  And wallah!! before I know it, my nails are dried!!!! I'm serious!! lol  And this all happens in less than 5 minutes! 

Unlike top coats that keep manicures nice and unchipped for up to 2 weeks.... the Jordana Quick Shine Topcoat lasts a perfect manicure for up to a maximum of 3-4 days before my nail polish is visibly chipping! That's probably the only downside of this nail polish, otherwise, it's seriously a topcoat I would recommend!! =)  

2nd-3rd Day after applying Jordana's Top Coat!  


How it looks under the sun! 

After wearing my nail polish for around 2-3 days, my nails remain unchipped and very shiny!  I do see a blemish or two (scratches I mean), but besides that I think the nails look pretty well kept!  It was probably the middle of my 3rd day that my nails began to chip, and right now, near the end of my 4th day of applying my top coat, 4 nails are chipped, and 6 of my nails still look alright!  

I'm currently half way done with my this top coat, and one thing I realized about it, is that the top coat is beginning to harden.  As I continued using the top coat, it became more condensed...if that makes sense. I'm not really surprised, cause that's also what happened to my Seche Vite Top Coat.  Maybe it has something to do with a chemical in the polish that allows a quick finish.  Maybe because the nail polish is so frequently exposed to the air, it began to harden throughout time.  That's my guess though, lol let me know if I'm right!  

OVERALL
So overall, I would recommend the Jordana Quick Shine Topcoat to others.  Instead of paying $10.99 for a topcoat, I paid $1.49 (costs $1.99 on the website: here) for a top coat that definitely did its job!  For such an affordable and cheap price, I really didn't expect an amazing outcome from this top coat, but it definitely surprised me!  

So the positives on the Jordana Quick Shine Topcoat is that it is 1) fast drying 2) quickens the drying speed of the base nail polish 3) gives a very nice shiny and glossy finish 4) Incredible price! and 5) Does a pretty good job keeping the nail polish from chipping!  As for the negatives....1) Lasts less than 5 days before the nail polish begins to chip & 2) Starts hardening after half the bottle is used. 

Overall, I'm very impressed by the result, and I will probably purchase another bottle after I'm done with the one I'm currently using!  I hope this review was helpful, and please feel free to ask any questions! =)  


Tuesday, January 22, 2013

My First Time Wearing Fake Eyelashes!

So....when was your first time applying fake eyelashes on?  lol well for me, it was yesterday!

Growing up, I've never really thought about using fake eyelashes.  I always thought that my eyelashes were pretty long to begin with, and I just figured that I'd just use mascara, and that's exactly what I've been doing up until yesterday!  lol yesterday, I had my first experience applying fake eyelashes, and to be very honest, it was a lot of fun!!!! =D

The eyelashes were a little difficult to put on at first, but after watching a youtube video on how to apply fake eyelashes on, it became extremely easy!  I know I know, I'm such a noob!! LOL  Anyway, the fake eyelashes I bought were from Daiso!  I've been obsessed with how cute Japanese people and my favorite youtube gyurus look with their fake eyelashes, and I just became quite curious to try them on myself!

The picture above shows the eyelashes that I bought from Daiso!  Like almost all the items in the store, these cost $1.50!  There were so many different designs, and I decided to choose #7 (straight type) , cause they looked most natural to me!  They aren't too dramatic, but they were dramatic enough to make a difference!  I can't read Japanese, so I have no idea what the box says, but all I know is that it comes with eye lash glue!! Yay!! How convenient! On the back of the container reads that the eye lashes were Made in China, and that the glue was Made in Korea! 

Alright, so this is how my experience began!  I've actually bought these eyelashes for two weeks now, but never wore them out!  I stayed at home the entire day yesterday (working), and decided to go out later on the evening, cause I needed some fresh air and all!  haha I guess something came over me, and I decided that I wanted to glam myself up by putting a cute outfit on, doing my hair, and applying make-up!  I wasn't in a hurry so I decided to try out my fake eyelashes after applying my eye makeup!  And wallah!! 


 LOL! So this is the outcome!!! Honestly...I really don't think I look that different compared to usual.... despite that, I was extremely excited about my first time wearing fake eyelashes!  haha and so... I went a little crazy taking pictures!!!


I tried doing the Asian pose (you know, the one where you put your camera above your head, and then you slightly tilt your head up and give a faint smile, so it'll look as if your eyes are huge and what not..), but inexperienced me totally failed!  haha I felt extremely odd, so I decided to take pictures of myself like I usually do, which is directing my camera directly parallel to my face!  Yep, haha I felt much more natural, more like me! =)  hehe

So...here's the question, what do I think of fake eyelashes?  

I think that some people look amazing with them!  But for people like me...I don't think they really make that big of a difference...I actually think I look better without them.... lol maybe it's cause I bought the wrong kind...but I kept getting comments from my family saying that my fake eyelashes looked super FAKE...(ironic huh?LOL), that they looked too plastic, and that I looked better without them!  

I agree on the fake part!  I think I bought the wrong type!  Mine were extremely straight and had a glare to it, and it looked really plastic, the picture below will explain what I mean!!! 


I think it looks kinda obvious that I'm wearing fake eyelashes!  For some reason though, I thought they looked pretty cute on. =)  

Anyway, I had a super fun experience putting fake eyelashes on for the first time!  I always wondered how fake eyelashes would feel on, and now I finally know!  I was able to feel something hard attached to my eye the entire time I wore them, and each time I had my eyes wide opened, ahaha I felt the lashes poking my eye brow!!  I found them so fascinating  that I couldn't stop staring at my fake eyelashes as I passed by the mirrors as I went out shopping!  

Hmm, so will I wear fake eyelashes again?  haha I think so!  Maybe not daily, but I think I'd wear them during special events!  But the next time I go shop for fake eyelashes, I'll make sure to buy ones that look more natural, and don't have a glare to them!! =)  

Yay for my first time!! =D


Friday, January 11, 2013

Review On: Revlon Renewist Lipstick!

So today, I will be sharing my thoughts on a few lipsticks from Revlon's Renewist Lipstick Collection! =D Yay!  

First and foremost, I would just like to mention that these are my current favorite lipsticks!  I've never been a lipstick fan.  I'm not sure why, but I guess as of a few years ago...when I was still in high school, I even envisioned myself never using lipstick!  haha well those days are gone, and now I'm a lipstick addict!  jk jk lol.  Anyway, lets get started! =)


Alright, so here is an image I put together (pat on that back =)), on the 4 lipstick colors from Revlon's Renewist Collection that I bought!  I'm not sure if you guys can see the names that I included in the picture, but either ways, the colors that I bought include (right to left): Lush Peony 080, Coming Up Roses 120, Cherry Desirable 210, and Plum Luck 160!  

Alright, so let the Review Begin! =D 

First and foremost again, lets talk about the packaging!  My first impression of this lipstick wasn't the best!  It's just natural for humans to primarily be attracted to an objects appearance, and I think as compared to other lipsticks from Revlon's Collection, the packaging for the Renewist Collection was lacking.  Here are some images of other Revlon Lipsticks.  


IMAGES FROM GOOGLE.COM

It's only my opinion though... regarding the packaging of Revlon's Renewist Lipstick Collection not being up to par, but what do you guys think?

Anyway, despite the packing, I was attracted to the lipstick, because it had something that other Revlon Lipsticks didn't have!  It had a moisture core!

Do you guys see it?
IMAGE FROM GOOGLE.COM

A constant problem I have with lipsticks, is that I don't feel like they give my lips enough moisture.  I don't think anyone...including yourself, wants to see anyone with extremely cracked colored lips.  Lipstick is supposed to add color to people's lips, it's supposed to be pretty, sexy, elegant, all those good terms, and when a person's lips are super dry, the potential outcome that lipsticks can bring just isn't there!  Therefore, I was determined to try this lipstick out!  

The result was amazing!  My lips felt very moisturized after using the lipsticks, as I will display pictures later on the post as proof! LOL  

For those who don't know what the Moisture Core is... The Moisture Core, is actually a ProCollogen Core, that immediately boost your lips to up to 80% of moisture!  In result, the user will have a smoother looking and of course more moisturizing lip and lip application!  Pretty good huh?  

Lets take a look at the ones I bought!  

1) LUSH PEONY 080 


This is how the color looks on me!  Everyone's lip color is different, so the color should look slightly different for each person.  I usually prefer redder toned lipsticks, but I actually really liked this color.  I felt extremely girly wearing it, and I was surprised that I was kinda able to pull it off! LOL 


Here's a close-up of the lipstick itself!  The picture of me wearing it actually turned out very similar to the color itself!  


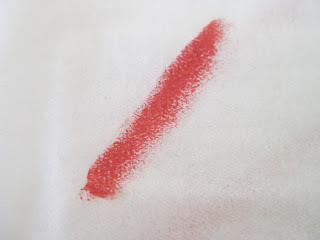
Swatch of Peony Lush 080!  Looks a little redder than the actual lipstick color...probably the lighting!  Sorry!  


2) COMING UP ROSES 120 


This has got to be my second favorite color out of these 4!  I really like Coming Up Roses, because it was the least dramatic out of the bunch, and had a mixture of orange to the red.  The color was quite calming compared to the rest, and I think it matched very well with my smokey eye!  


Here's a close-up of the lipstick!  I think this lip color is one that could be worn with any make-up and outfit!  I love it, and it's definitely my everyday color!  


As you guys can probably tell, it has an orange undertone, and is much more similar to our natural lip color as opposed to Peony Lush 080!  


3) CHERRY DESIRABLE 210!! 


Cherry Desirable 210 is my absolute favorite out of the bunch!  I love the dramatic outcome it gives, and I feel like this color compliments me the most! =)  Ahhh  I can't get over how much I love it!  There are days when I don't put my make-up on, and right when I apply Cherry Desirable on my lips, my face just immediately looks more put together!!! Because the color it so strong, it gives a somehow concealing affect, and brings people's attention to my lips instead of to the blemishes on my face! =)  


Close Up of Cherry Desirable 210!!!!!  


 Color Swatch of Cherry Desirable 210!


4) PLUM LUCK 160


I actually like how I look with this color in the picture, but for some reason I just end up using this color the least out of the others!  I was surprised with the outcome!  I expected a very dark raspberry vampy color, but it ended up more red than I had envisioned!  


Close-up!  Don't be mistakened!  I do like this color, I just don't love it lol.  


And Here's a swatch of it! ! =)


Alright, so here is a duplicate of the first image above!  So to sum things up, these are the four colors I bought from Revlon's Renewist Lipstick Collection!  I love them, and I would totally recommend them!  I'm not sure if these are still in store, but if not, they can always be found on ebay.com or amazon.com!  

If you guys are looking for a good quality lipstick that is affordable and moisturizing, then Revlon's Renewist Lipsticks are the way to go!  There a many more colors besides the ones I bought, and I'm actually excited to get a hold of them! 

As you guys were probably able to tell from the pictures, my lips looked quite moisturized and smooth after applying the lipsticks!  The colors were pretty opaque, as opposed to some lipsticks colors that just don't show up as well!  I love these lipsticks so much!  As of last month, I actually went out to buy another lipstick of Cherry Desirable, because I liked the color so much, and was scared that I'd be too late if I waited any longer!  

I hope this review was beneficial, and feel free to ask any questions! =)  


Tuesday, January 8, 2013

Japanese Inspired Make-Up Routine + My Day

I would say I had a pretty productive day today.  I didn't end up doing everything that I wrote down on my planner, but nonetheless haha I'm kinda satisfied.  I could have used my time a little better though, but anyway!

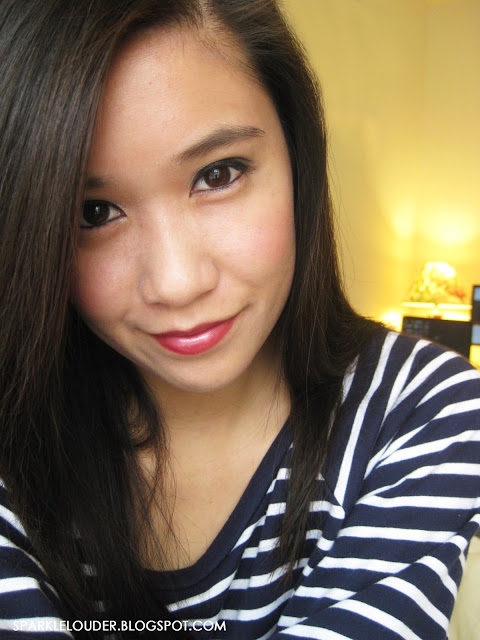
I started my day getting ready for filming.  (Currently making a haul video!  So stay tuned! =)) I've been researching on how Japanese people apply their make-up, cause their skin is absolutely gorgeous, and hey!, I think I'm getting the hang of it!  I used to wonder why my Japanese friend would take 2 hours to get ready for school...and after experimenting this morning, I could kinda understand why it would take so long.  She puts on more make-up than I do, dresses up more than I do, and her skin looks way more flawless then mine, so I'm sure she puts a lot of time in getting ready!  LOL  For the skin part...I'm sure she's just blessed with beautiful skin!  Anyway, here's a picture of how I looked!


I didn't edit this picture at all, except for changing the exposure a little.  I'm actually surprised at how clear my skin looks!!!!  Yay to putting more effort on my make-up!  It's crazy how putting more make-up on actually results in a more natural look!  I actually apply less make-up on when I use my own make-up routine...and surprisingly, it doesn't look this natural!  Yay! New make-up routine!  =D hehe

I actually took some pictures of my outfit, and I'll be writing a post on my outfit of the day soon! =)  

Anyway, after filming, my family and I went for lunch, and after that, we went shopping!  Well not really shopping, but just to get some exercise done and I guess surround ourselves with merchandise!  We ended up going to a plaza, mainly for Nordstrom Rack, and I actually ended up buying a white pencil eyeliner (NYX).  


I don't know about you guys, but I absolutely love Nordstrom Rack!  It has amazing deals, and I've bought quite a decent amount of stuff from them throughout the passed year!  


Here's a picture of some palm trees and a waterfall (OMG I meant Water Fountain LOL) that is located at the corner of the plaza.  haha I seriously think I have a thing with palm trees, cause I always like taking pictures of them!  

After finishing up my journey at Nordstrom Rack, I went to Ross, which was at the same plaza, and OMG, guess what I found?????  


I found a gigantic bag of Ghirardelli Chocolates (50 pieces to be specific), for $9.99!  That's a pretty good price right?  Ghirardelli Chocolate is pretty well known, and I don't think anyone can normally find 50 pieces sold for $10.... haha as it shows on my face, I was pretty darn excited!  I am a huge huge huge fan of Chocolate!  I don't think any words can express my love for Chocolate!  NO words!  lol... Well...despite my love for chocolate I ended up putting it back on the shelf, and left Ross empty handed!  Though I love chocolate, I really need to watch my diet.  Health Diet I mean...  It's not that I want to lose weight or anything, it's just I don't want to end up getting a stroke when I'm 50...  I don't want to have a bunch of cavities (cause my teeth are really sensitive, and as scary as this may sound, I think my teeth are in love with cavities =(  Cavities just keep on coming!).  So yeah..I didn't buy any...cause I knew I wouldn't be able to refrain myself from eating more than 1 piece a day!  Sigh. =(  It was the right choice though!  And speaking of which....having braces really doesn't help!  Sugar somehow eats up the glue that attaches my brackets to my teeth...and it would be so painful to have a broken bracket fixed...=(  My ortho would not be happy!  

I went to McDonalds for a quick snack before Dinner, and then I was off home!  I didn't do a whole lot today, but I was just happy that I was able to get the specific parts of my video recorded!  That's basically it for my day!  

Here's the last picture that I'm gonna include on my post!  It's a picture of my current nails!  =)  


As I have mentioned on my previous post (click here), I love doing my nails!  I can't wait to get my nails done one day, and I'm really looking forward to that day!  

I'll end my post here!  Good Night Ya'll!